JieKou.AI × LangBot Configuration Guide
1. Get an API key
Visit JieKou.AI, then register and log in. Enter the invitation code 【YGHNZ0】 to receive a $2 registration bonus.(1) Get an API key
Open the 【API key】 management page, click the add button, enter a custom key name, and generate an API key.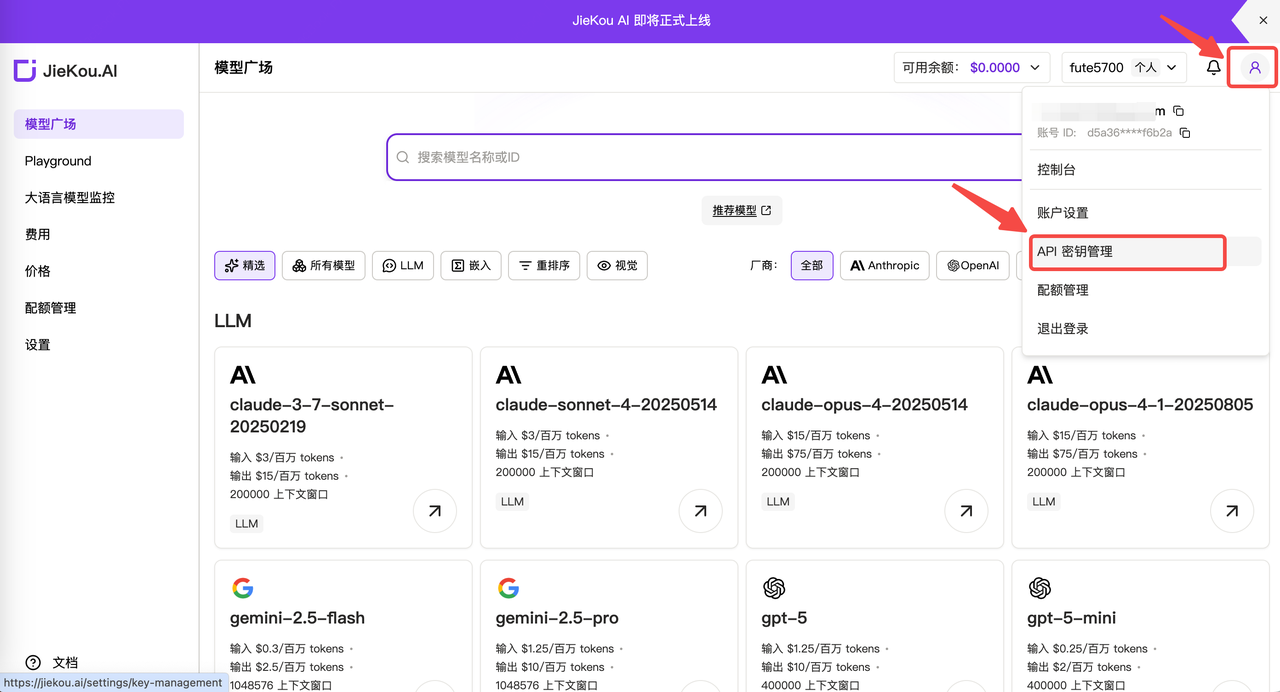
(2) Generate and save the API key
!!Note: Keys are stored encrypted on the server and cannot be viewed again after creation. Please keep your key safe. If it is lost, you need to delete it in the console and create a new one.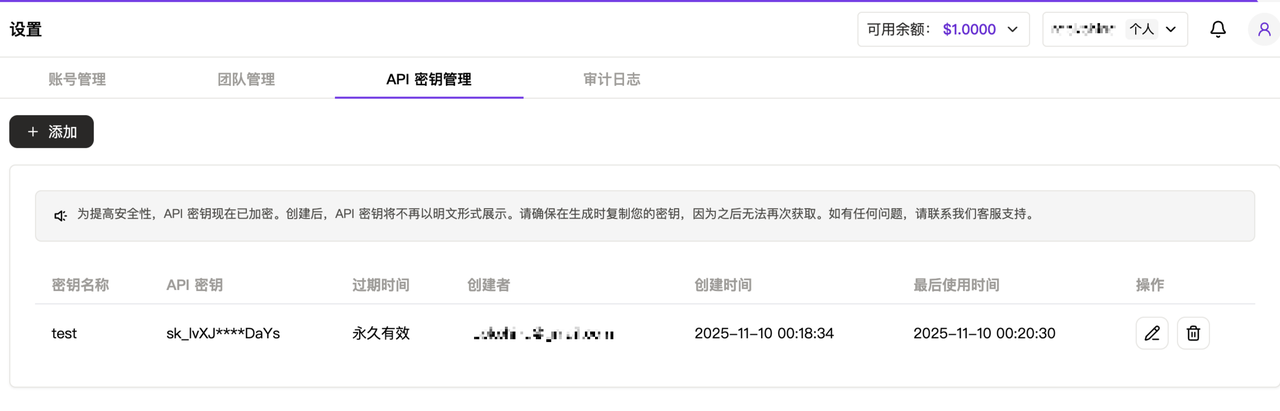
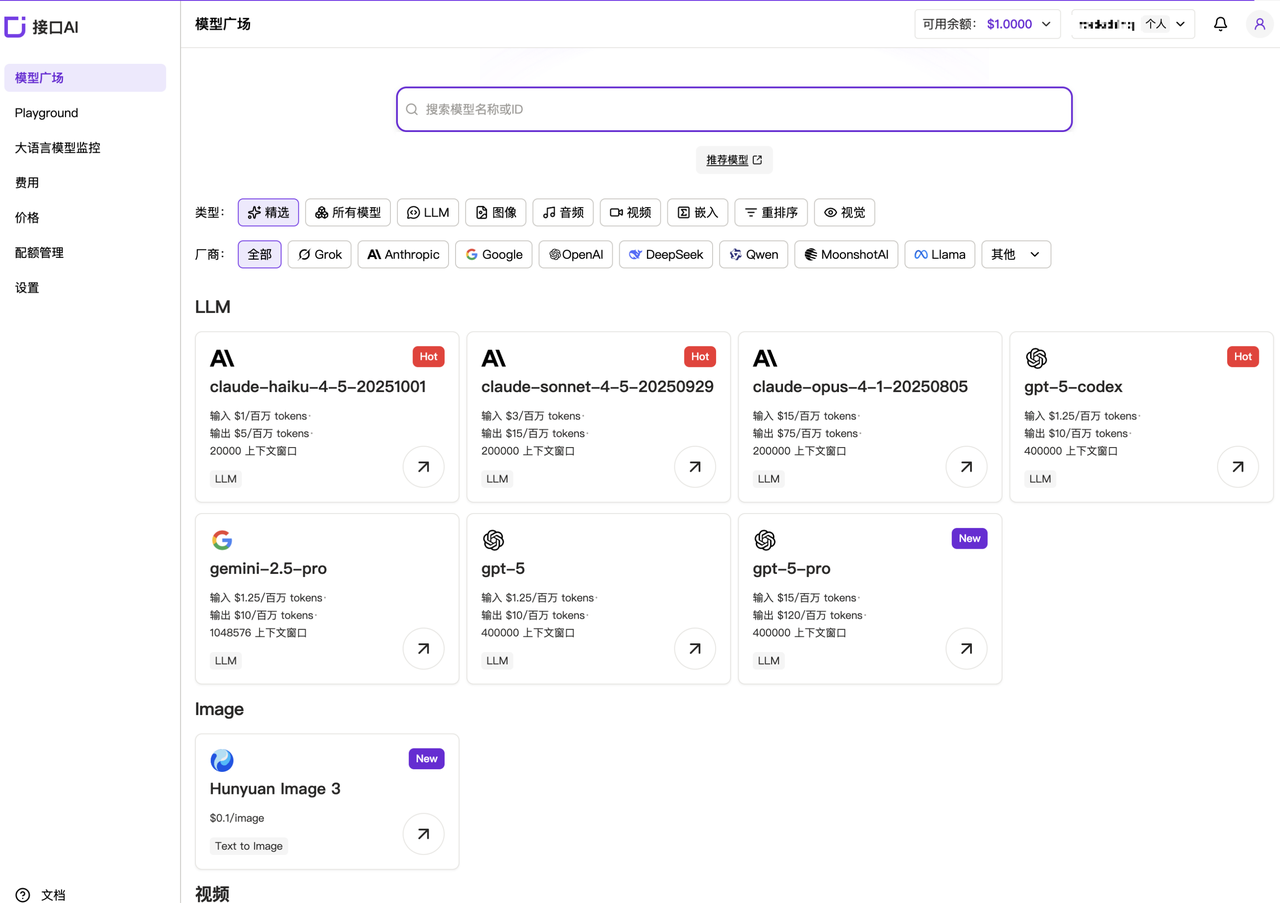
(3) Get the 【Model ID】
Recommended model IDs:- Claude-sonnet-4-5
- Gpt-5
- Gpt-4o
- Gemini-2.5-pro
2. Deploy and configure LangBot
With Docker, you can conveniently deploy LangBot on Windows, Mac, and Linux. Before deployment, make sure Git, Docker, and Docker Compose are installed. Project address: https://github.com/RockChinQ/LangBot(1) Deploy LangBot with Docker
Clone this project with Git:- If your host is located in mainland China, you can change
https://github.com/langbot-app/LangBotin the command above tohttps://gitcode.com/RockChinQ/LangBotto use a domestic mirror source. - If your host is located in mainland China, you can consider changing the image name in the
docker-compose.yamlfile todocker.langbot.app/langbot-public/rockchin/langbot:latestto use the image source we provide. - It is recommended to configure a Docker container proxy to ensure smooth network access while LangBot is running.
(2) Create the configuration file
On first startup, a prompt for creating a configuration file will be output. Continue by configuring the file as instructed. The container maps port 5300 for WebUI use. You can visit http://127.0.0.1:5300 to view the WebUI. It also maps ports 2280-2290 for reverse connections from messaging platform adapters that use the OneBot protocol.(3) Configure the conversation model
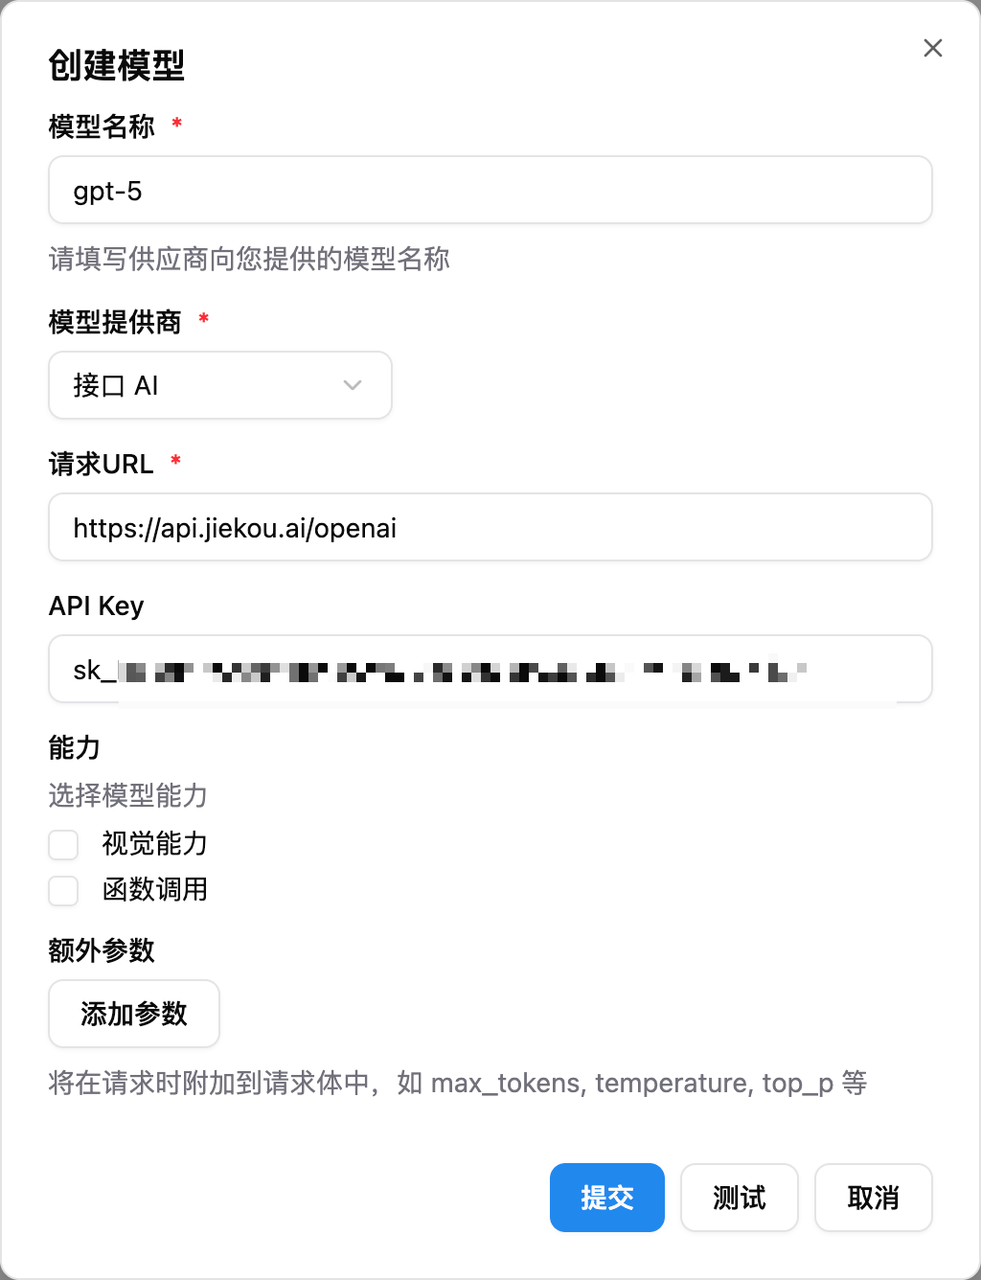
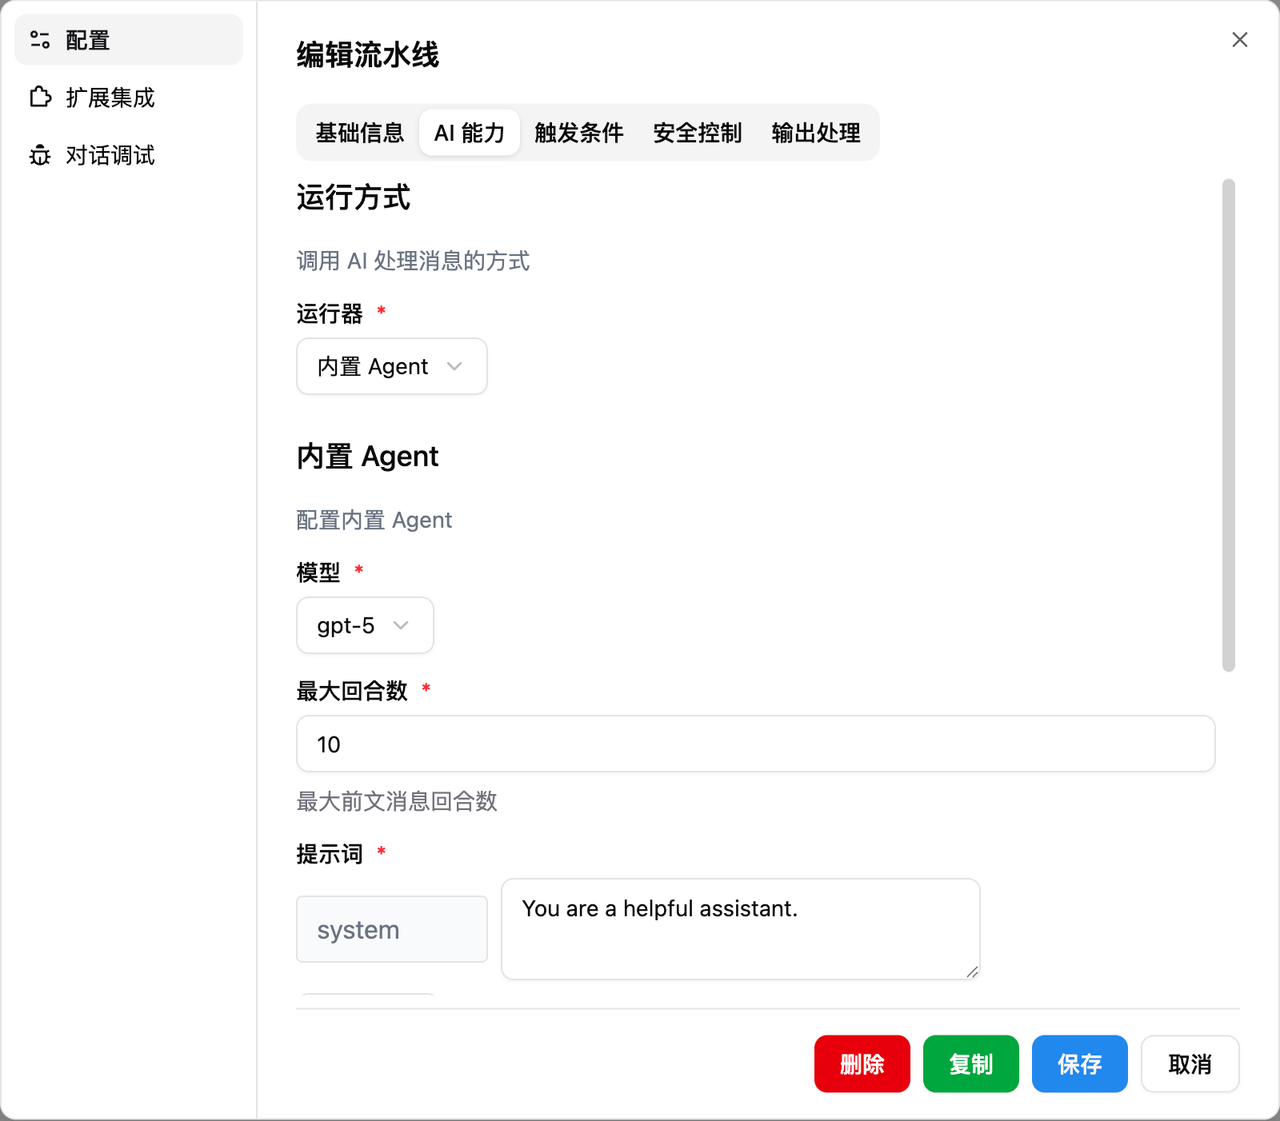
Open LangBot, click model configuration, and select Interface AI as the model provider. Configure the model using the following information.- Model name: the required model name copied from the JieKou.AI official website
- Model provider: Interface AI
- Request URL: https://api.highwayapi.ai/openai
- API Key: the key saved from the JieKou.AI official website
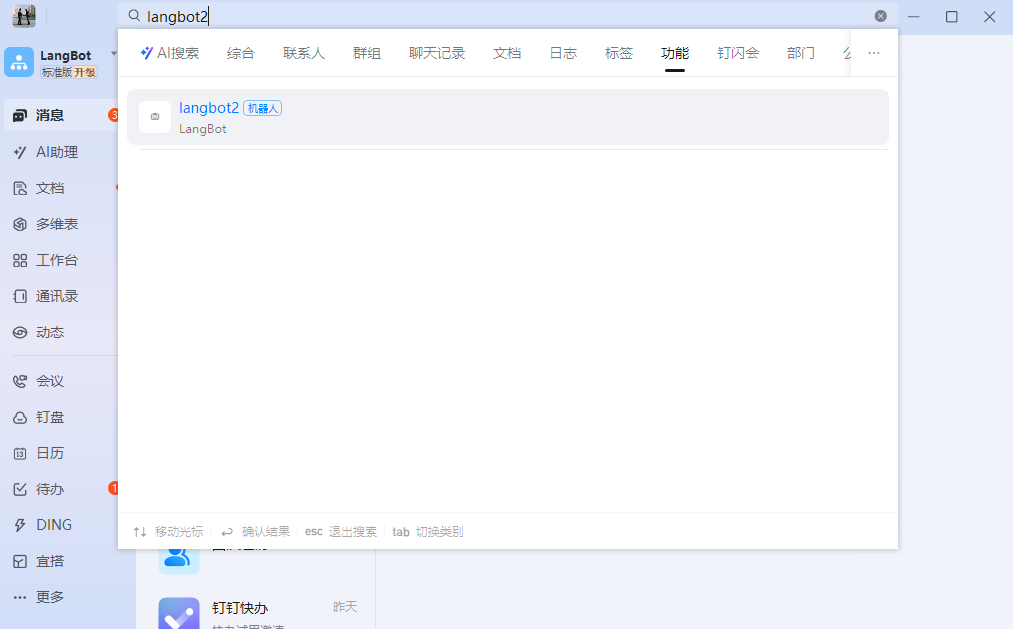
3. Connect a platform
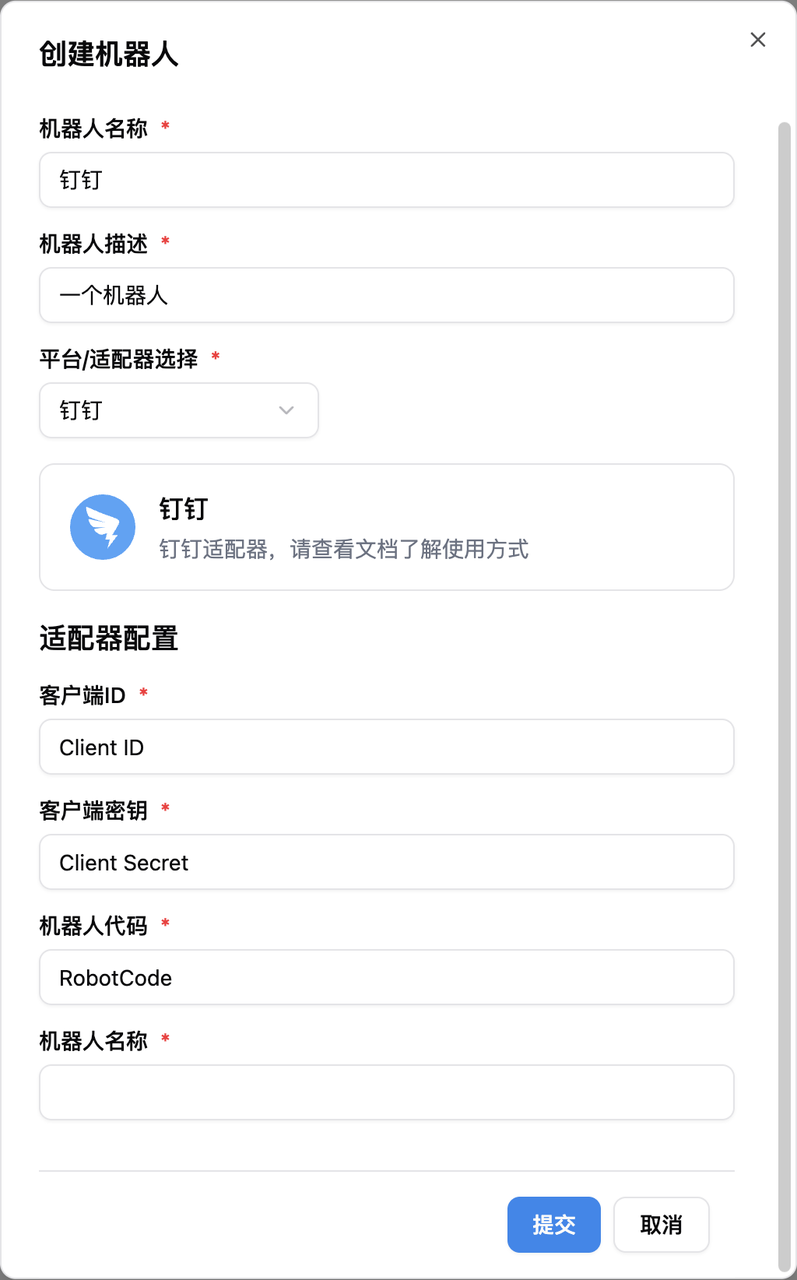
LangBot supports connecting chatbots to platforms such as QQ, WeChat Official Accounts, and Feishu. Using DingTalk as an example, the LangBot integration guide is as follows.(1) Create a bot
Go to the DingTalk developer console, log in, and enter your organization. Address: https://open-dev.dingtalk.com/ Click 【Application Development】 at the top, select 【Create Application】, fill in the bot’s basic information, and save it.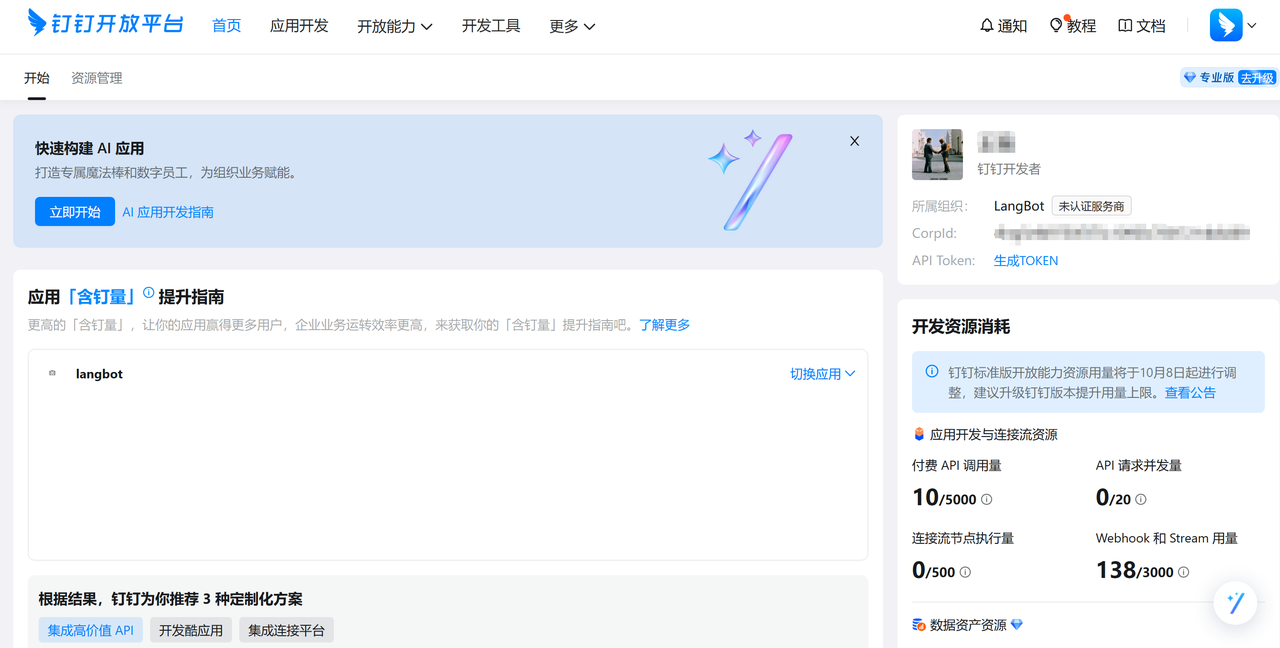
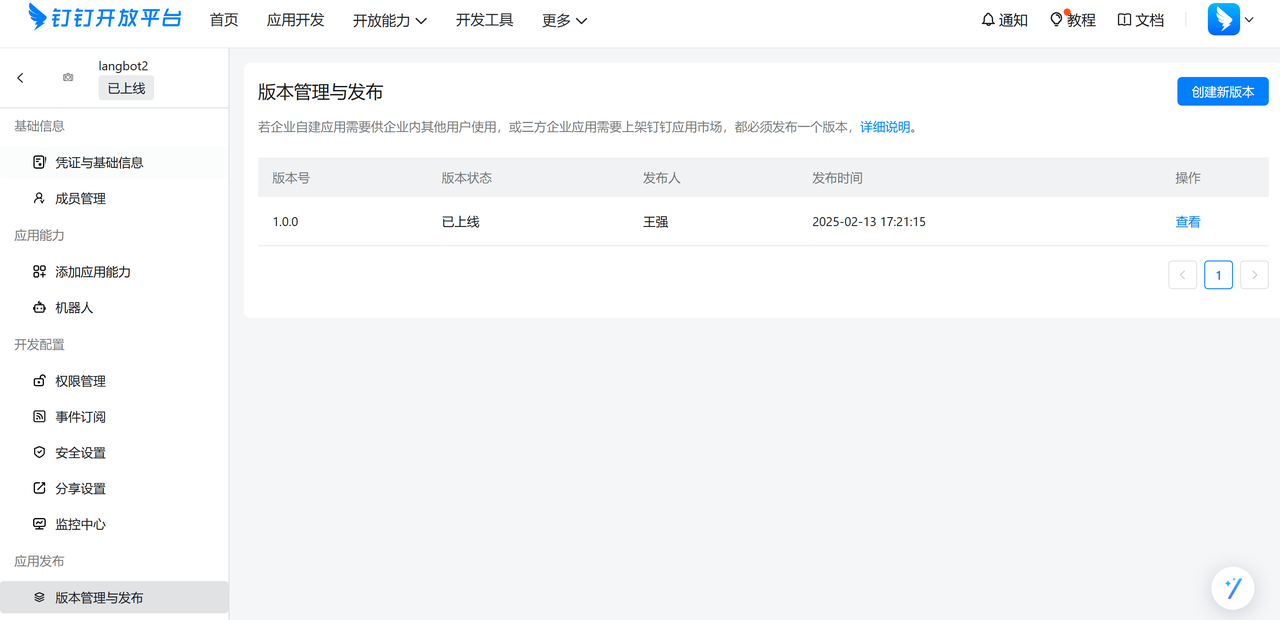
(2) Configure the bot
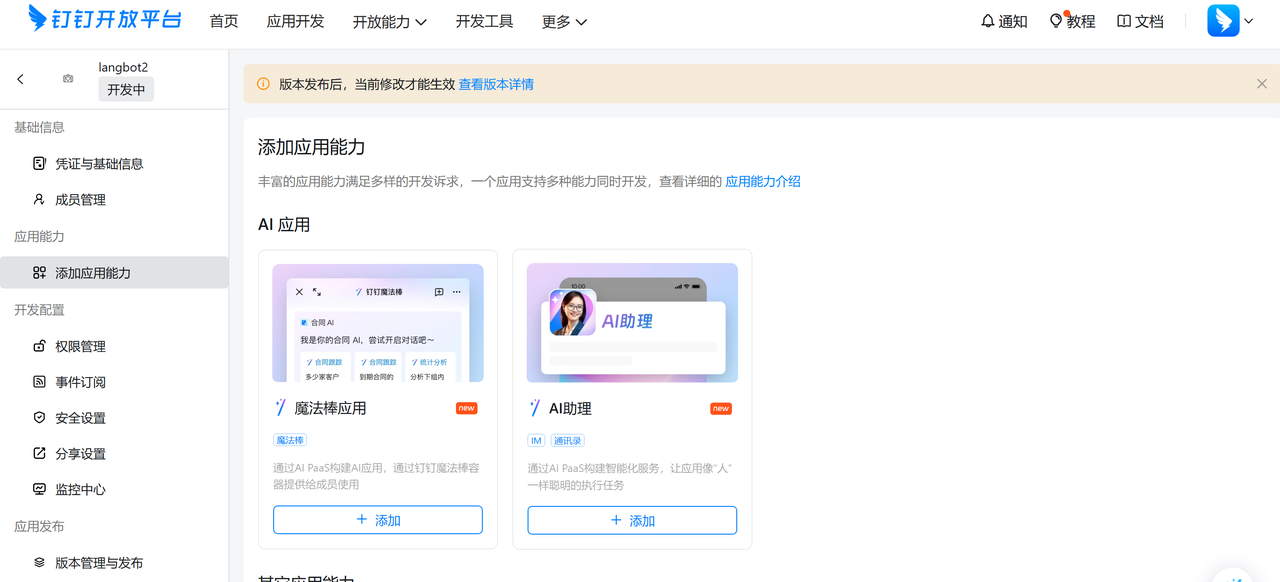
Select 【Add Application Capability】 to add bot capabilities to the application. Click the 【Bot】 tab on the left, fill in the bot configuration information, complete basic settings such as name, description, and message name, and click publish after configuration is complete.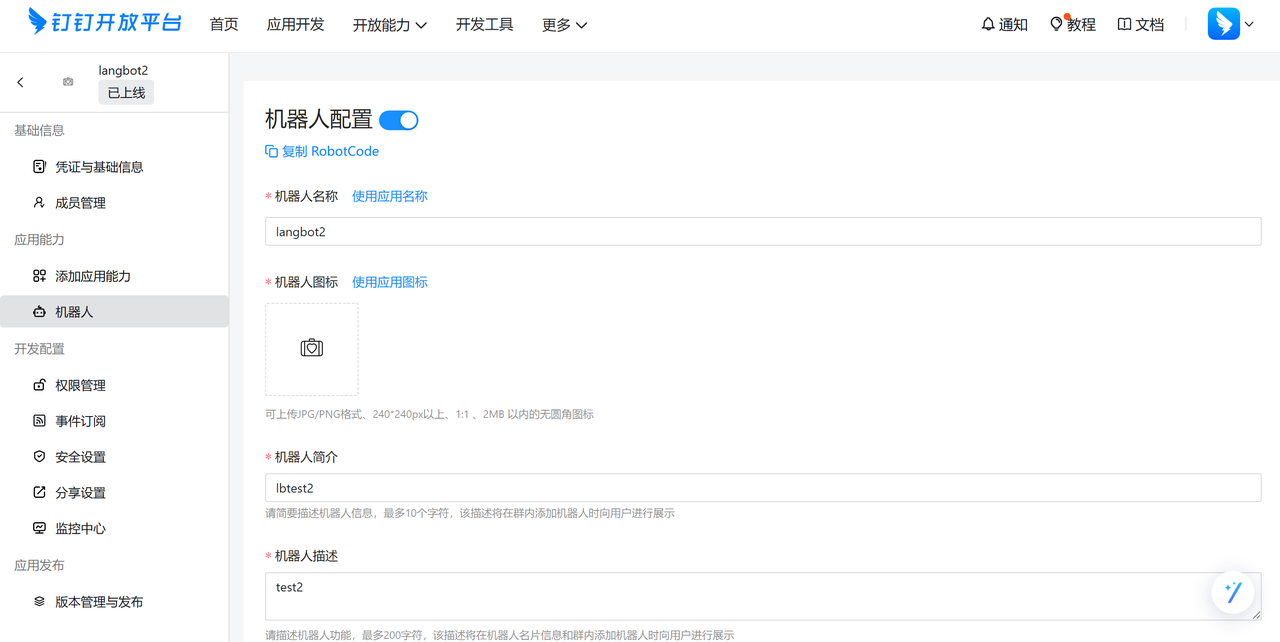
(3) Add the bot
Search for the bot name you just configured in DingTalk, then click the bot to chat with it.